Blog
3 Common Types Of Roof Underlayment & Their Functions
When it comes to protecting your home from the elements, your roof is your first line of defense. But what lies beneath the shingles is just as important. Roof underlayment plays a crucial role in maintaining the durability and effectiveness of your roofing system.
Today’s detailed guide is designed to explore everything you need to know about roof underlayment, including:
- Its types
- Benefits
- Installation process
What Is Roof Underlayment?

Roof underlayment is a water-resistant or waterproof barrier material that is installed directly onto your roof deck before the shingles are applied. It serves as an additional protective layer against water infiltration, wind, and other weather-related damage. Think of it as your roof’s insurance policy—providing an extra layer of security to ensure your home remains safe and dry.
Why Is Roof Underlayment Important?
Roof underlayment is essential for several reasons:
- Water Protection: It prevents water from seeping into your home if your shingles are damaged or blown off during a storm.
- Weather Barrier: It adds an extra layer of protection against ice dams, wind-driven rain, and snow.
- Shingle Longevity: It helps to prolong the life of your shingles by reducing the risk of water damage.
- Fire Resistance: Some underlayments are fire-resistant, adding another layer of safety to your home.
3 Types of Roof Underlayment
There are three main types of roof underlayment, each with its own set of advantages and disadvantages. Understanding these differences will help you make an informed decision for your home.
1. Asphalt-Saturated Felt
Overview:
- Material: Made from a blend of asphalt, polyester, cellulose, and bitumen.
- Thickness: Usually available in 15-pound and 30-pound thicknesses.
Advantages:
- Cost-Effective: Generally less expensive than synthetic alternatives.
- Availability: Widely available and easy to source.
Disadvantages:
- Weight: Heavier than synthetic underlayment, which can make installation more labor-intensive.
- Moisture Retention: Can absorb moisture, making it prone to wrinkling and tearing.
2. Rubberized Asphalt
Overview:
- Material: Composed of rubber polymers and asphalt.
- Thickness: Typically thicker than asphalt-saturated felt.
Advantages:
- Waterproof: Offers superior water resistance.
- Self-Adhering: Often comes with an adhesive backing for easier installation.
Disadvantages:
- Cost: More expensive than other types of underlayment.
- Temperature Sensitivity: Can become brittle in cold temperatures.
3. Synthetic Underlayment
Overview:
- Material: Made from polypropylene or polyethylene.
- Thickness: Varies depending on the brand and type.
Advantages:
- Durability: More tear-resistant and durable than asphalt-saturated felt.
- Lightweight: Easier to handle and install.
- Weather Resistance: Highly resistant to UV rays and wind.
Disadvantages:
- Cost: Generally more expensive than asphalt-saturated felt.
- Slipperiness: Can be slippery when wet, posing a safety risk during installation.
How to Choose the Right Roof Underlayment
Choosing the right roof underlayment for your home depends on several factors, including your local climate, the type of roofing material, and your budget. Here are some tips to help you make the best choice:
- Climate: If you live in an area prone to heavy rainfall or snow, consider a waterproof option like rubberized asphalt or high-quality synthetic underlayment.
- Roofing Material: Match the underlayment to your roofing material. For example, metal roofs often pair well with synthetic underlayment due to its durability.
- Budget: While synthetic underlayment may be more expensive, its longevity and durability can offer better value in the long run.
- Building Codes: Check local building codes and manufacturer recommendations for the type of underlayment required for your roofing system.
Understanding the Installation Process

Installing roof underlayment is a critical step in the roofing process. Here’s a step-by-step guide to help you understand how it’s done:
Step 1: Prepare the Roof Deck
- Clean the Surface: Ensure the roof deck is clean, dry, and free of any debris.
- Inspect for Damage: Check for any damaged or rotten sections of the roof deck and repair them as needed.
Step 2: Install Drip Edge
- Placement: Install a drip edge along the eaves and rake edges of the roof.
- Purpose: The drip edge directs water away from the fascia and into the gutters, preventing water damage.
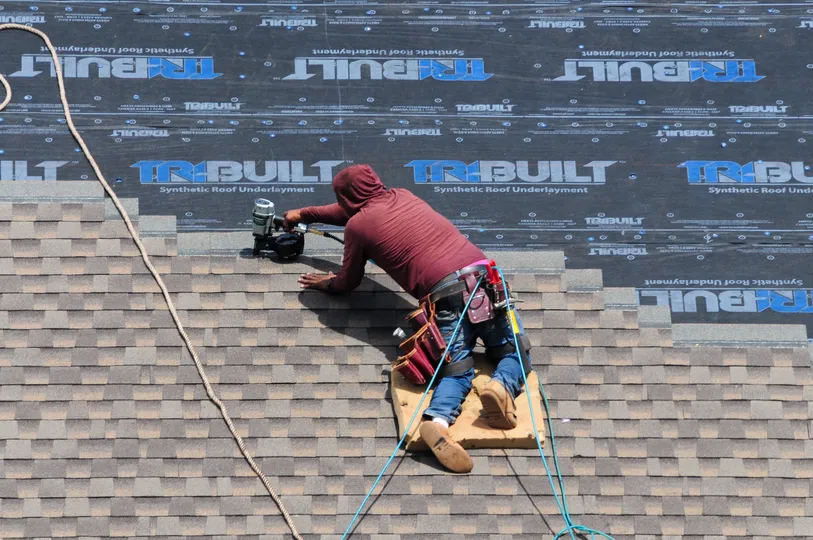
Step 3: Lay the Underlayment
- First Course: Start at the lowest point of the roof and work your way up. Roll out the underlayment horizontally, overlapping each row by 2-4 inches.
- Fastening: Use roofing nails or staples to secure the underlayment. Follow the manufacturer’s guidelines for spacing and placement.
- Valleys and Ridges: Pay extra attention to valleys, ridges, and other vulnerable areas. Use additional layers of underlayment or specialized products for added protection.
Step 4: Install Flashing
- Chimneys and Skylights: Install flashing around chimneys, skylights, and other roof penetrations to prevent water infiltration.
- Valley Flashing: Install valley flashing before laying the underlayment to ensure a watertight seal.
Step 5: Final Check
- Inspect: Perform a thorough inspection to ensure the underlayment is properly installed and free of wrinkles or gaps.
- Adjust: Make any necessary adjustments or repairs before installing the shingles.
Common Mistakes to Avoid
Even a small mistake during the installation of roof underlayment can lead to significant problems down the road. Here are some common mistakes to watch out for:
- Insufficient Overlap: Ensure each row of underlayment overlaps the previous one by at least 2-4 inches to prevent water infiltration.
- Incorrect Fastening: Use the recommended number of fasteners and place them according to the manufacturer’s guidelines.
- Ignoring Valleys and Ridges: Pay special attention to these areas, as they are more susceptible to water damage.
- Skipping the Drip Edge: Always install a drip edge to direct water away from the fascia and into the gutters.
Benefits of Professional Installation
While DIY installation might be tempting, hiring a professional roofing contractor offers several advantages:
- Expertise: Professionals have the knowledge and experience to install underlayment correctly and efficiently.
- Warranty: Many roofing contractors offer warranties on their work, providing peace of mind.
- Safety: Roofing can be dangerous work. Professionals have the necessary safety equipment and training to complete the job safely.
- Quality Materials: Contractors often have access to higher-quality materials and can recommend the best options for your specific needs.
Signs Your Roof Underlayment Needs Replacement
Roof underlayment is designed to last, but it’s not impervious to wear and tear. Here are some signs it might be time to replace your roof underlayment:
- Leaks: Water stains on your ceiling or walls could indicate that your underlayment has failed.
- Curling or Buckling Shingles: This can be a sign that moisture has penetrated the underlayment.
- Visible Damage: If you can see tears, punctures, or other damage to the underlayment, it’s time for a replacement.
- Old Age: If your roof is nearing the end of its lifespan, it’s a good idea to replace the underlayment when you replace the shingles.
We Install Your Roofing Underlayment
Roof underlayment is a crucial component of your roofing system, providing an essential layer of protection against water, wind, and other weather-related damage.
If you’re considering a new roof or need to replace your existing underlayment, consult with your local professional roofing contractor at Avenue Roofing to determine the best option for your home. Investing in high-quality underlayment and proper installation will pay off in the long run, providing peace of mind and protecting your most valuable asset—your home.
For more information and professional guidance, don’t hesitate to reach out to our team of experts. We’re here to help you make the best decision for your roofing needs.


